Returning to the Garden Blog

 Well Hello!

I created a new website! It has my blog and the herbal products that I'm creating from the home grown herbs and flowers that I grow. Please come on over and follow me at:

www.katiebirdsgarden.com 

I think its been years...yes it has. We've done a lot of things: our son is 9, I've had a couple different jobs, we own a home. But I still feel the need to create and write about it. 

This blog started with the garden and I'm going to continue with the garden! 

I now have a raised bed garden in our back yard, made up of 12, 3x4' steel beds. It looks really nice and produces well also. I started them last year with 8 beds. This year I added 4 more and also surrounded the garden with a flower garden! Its so beautiful, so full of pollinators and also the rogue critters. 

Since it was a lot of cubic feet to fill, I chose to follow the hügelkultur route. I filled the bottoms with 6" of dead tree logs, sticks and bits. Topped that with tons of decomposing leaves and then about 6" of black dirt. It is super healthy and the plants grow crazy. After the first year, the dirt sank quite a bit, as expected, so I've been making a point to compost all of our food waste into the forest compost pile, along with all of the garden pruning bits and dead plants. The pile should create enough compost each fall to top off the beds in expectation of next spring.

I'm quite proud that I started all the plants (with the exception of brussels sprouts and some fancy hot peppers) from seed or bulb/tuber. 

I hope to continue with this blog, similar to a garden and kitchen journal. I hope you choose to follow along! 


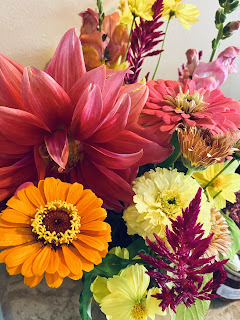
fresh flower bouquet


Because this is the age of social media and monetization, I find it fun to try out different apps and ways to fund my garden activities. I chose to use the Amazon Affiliates program. It's always appreciated if you click through my Amazon link and complete your purchases through that. Just by going "through" my link, a tiny percentage of whatever you purchase may be shared to my small business.
Comments

Popular posts from this blog

Pretty Pages

    If you want some blog and web-candy, check out some of my favorite sites.  Some are wedding idea sites, and some are just plain pretty.  Style Me Pretty is a definite necessary website to check out for anyone planning a wedding or something fancy.  Tons of ideas, pretty pictures and also local vendors can be found on this beauty of a site!. Eat Drink Pretty Fresh from St. Paul! Another blogilicious page that has all kinds of creative, delicious and beautiful ideas. Little Birdie Secrets is a new one for me, but it has all kinds of crafty ideas for any occasion.  What I'm admiring are the organza flower tutorials .

"Kitty, that's my pot pie!"

This is what was created out of the leftover roast chicken.  I used a 9" deepdish pie plate and only used puff pastry on the top.  I have an aversion to soggy bottoms.  We had another couple over and between the 4 of us-actually the guys ate 3/4s of it-it disappeared!  There were plenty of South Park pot pie quotes laughed at :)  

Pelmet Tutorial

Finally here it is!  These are super easy, quite quick and don't cost much at all.  Things you'll need: Foam board (use your Micheal's coupons!) Cotton batting-I bought the crib-size and still have leftovers Fabric Glue gun and glue sticks-I used 2 long ones Duct tape Picture hangers or small brackets of your choice Step 1: Measure your window width and cut or tape more than one piece of foam board together to fit the space if needed.  I made sure it was at least 1" beyond each side of the wood moulding.  Remember you'll add thickness and need to attach brackets.  Mine were 64" long, 9" tall and the sides were 2" wide, your proportions may be different depending on the window size and style.  Duck tape holds it all together nicely.  I did add wooden chopsticks to the middle where I taped two long pieces together so it didn't bend.  You won't have to do this if your window is smaller....